
Access Control Tokens with Postman
You can use Postman to get a JWT Token from the IdentityServer, and use that in a subsequent request to your local Firely Server instance.
Make sure IdentityServer is running (see Set up an Identity Provider), I assume at http://localhost:5100
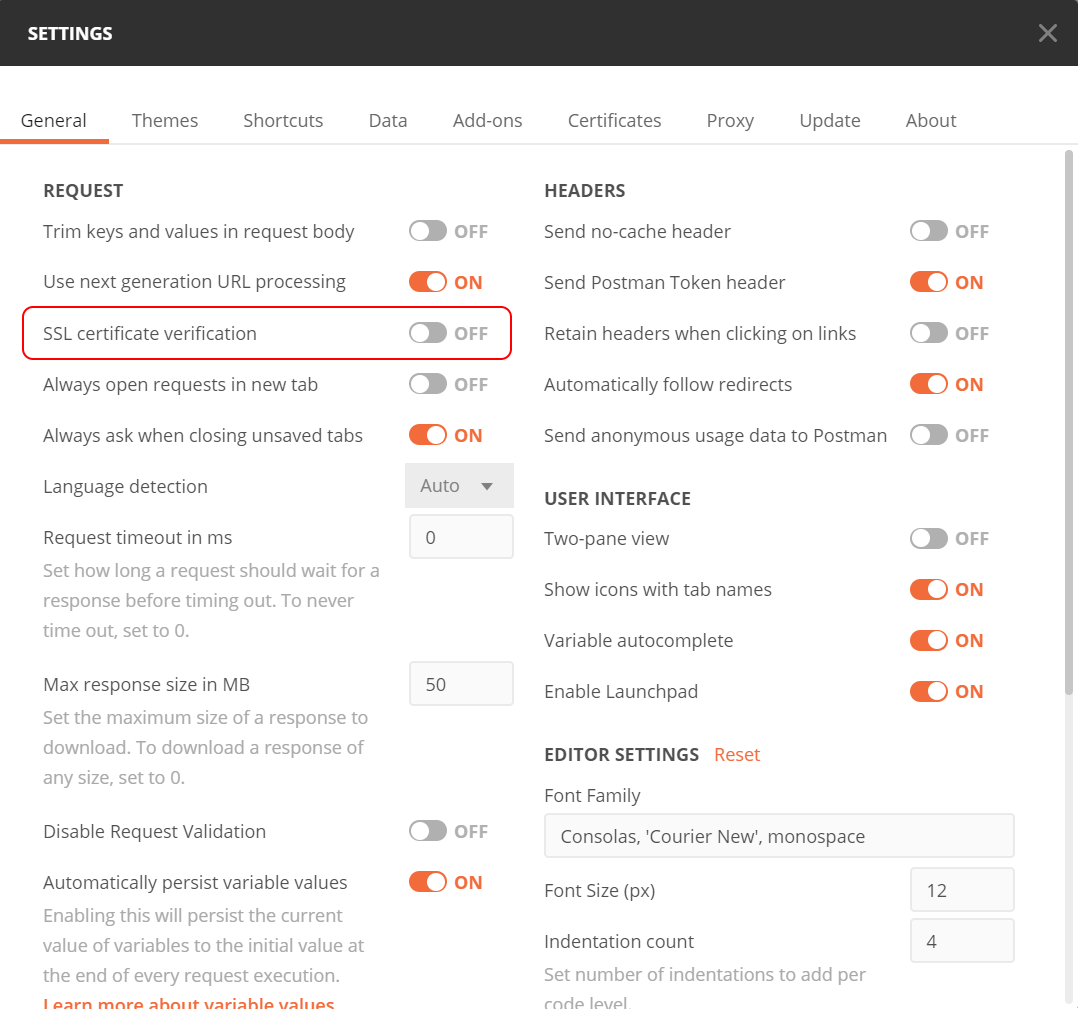
Open Postman Settings (menu: File | Settings) and turn ssl certificate validation off, otherwise your self-signed certificate will not be accepted.
Open a request in Postman, let’s say GET /Patient
Verify that you get a 401 (smile)
Go to the Headers tab and make sure there is no Authorization header (if there is, it might have an outdated token, and you don’t want that)
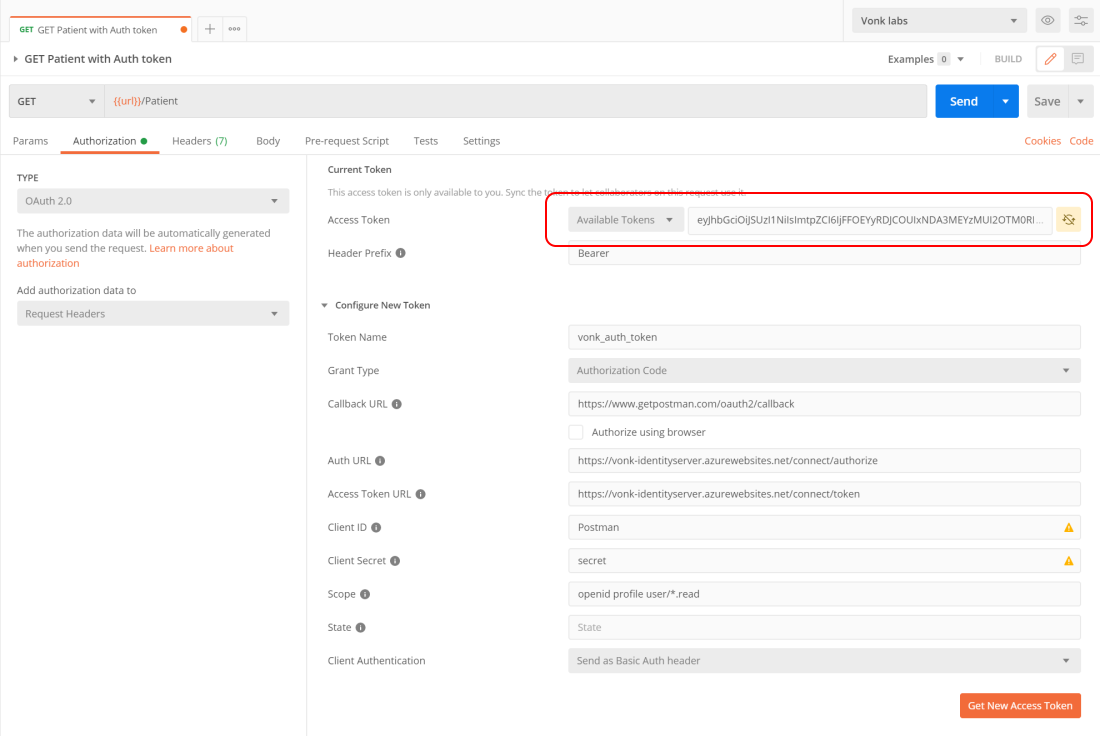
Go to the Authorization tab, that looks like this:
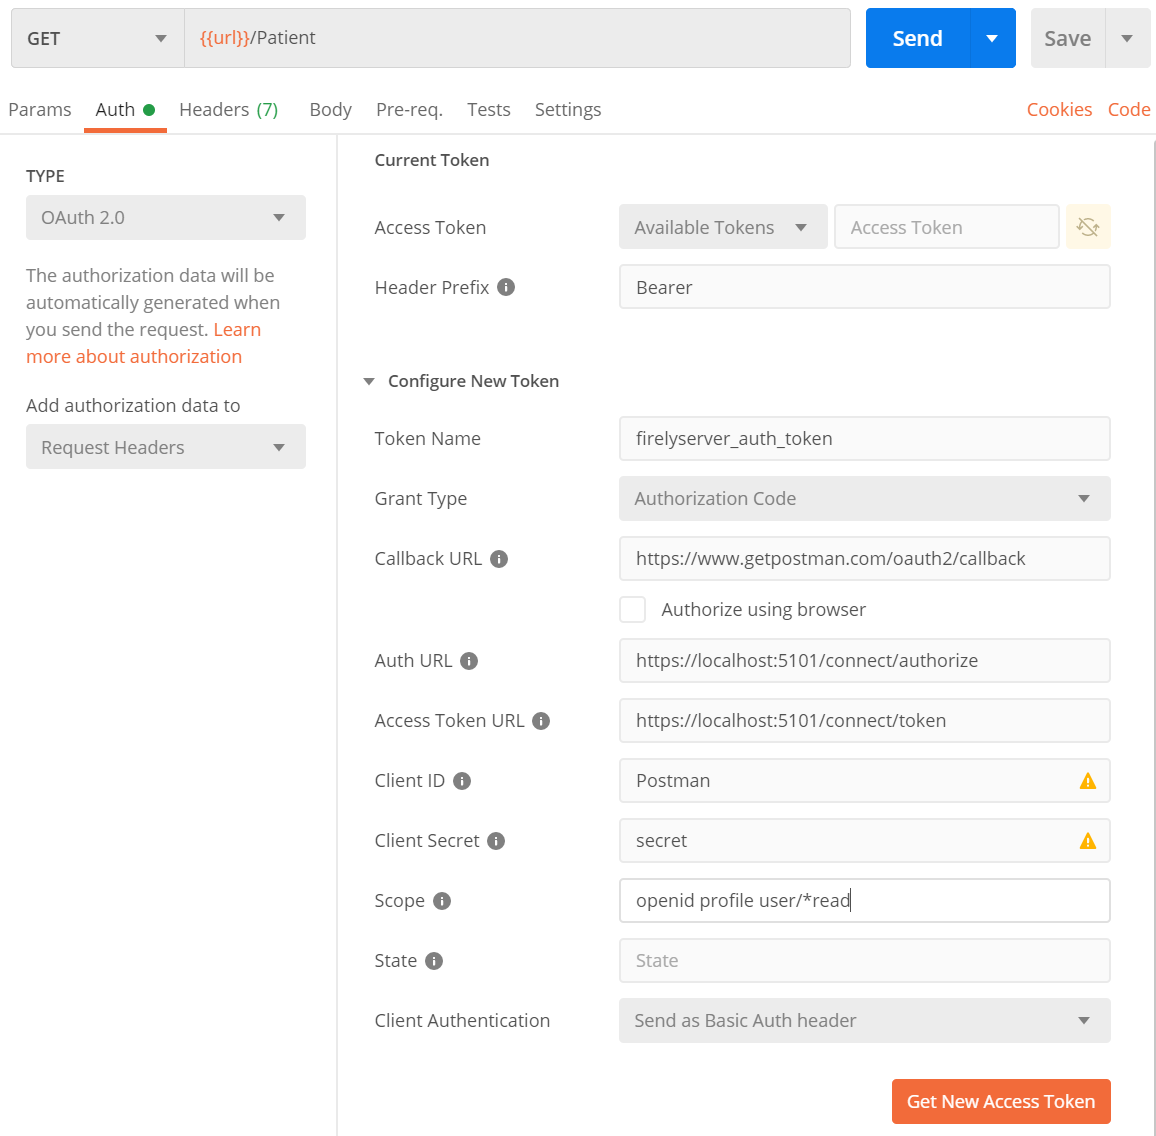
In the ‘Type’ dropdown choose OAuth2 (SMART uses OpenIdConnect, which is a specialization of OAuth2)
In the ‘Add authorization data to’ dropdown choose ‘Request headers’ (probably preselected)
Now fill in the blank fields under section ‘Configure New Token’.
Take special care to use https in the AUTH URL and Access Token URL fields.
You can alter the values in ‘Scope’ to get other claims in the token.
Click ‘Get New Access Token’ and you’ll be presented with the login screen of IdentityServer:
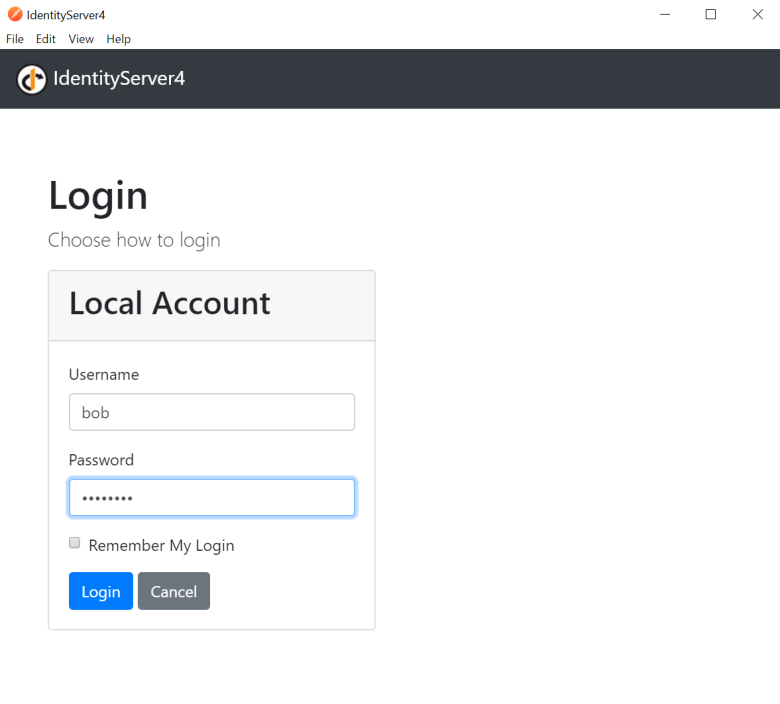
Log in as Bob or Alice and you return to Postman with the newly retrieved token:
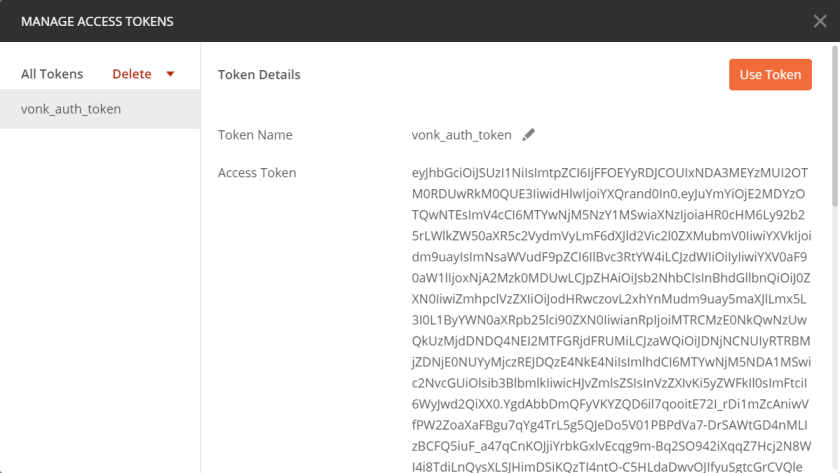
Optionally, you can copy the value of the access token and paste it into JWT.io. It will show you the contents of the token.
Back in Postman, click ‘Use Token’.
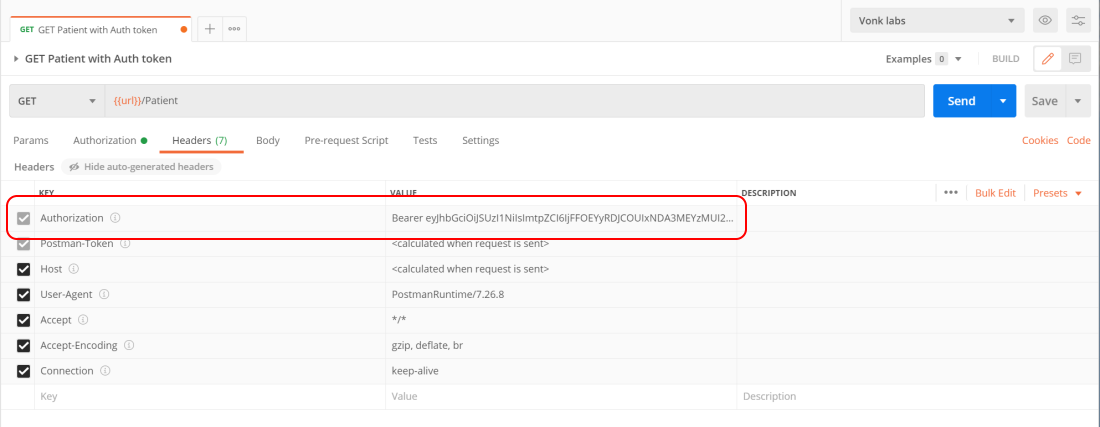
The token will be added as Authorization header to the request (make sure you have disabled ‘Hide auto-generated headers’ in the Headers tab):
Issue the original request again. Provided there is a Patient with the identifier of Bob or Alice (or whomever you chose), it will be in the search results.